How To Adjust Size

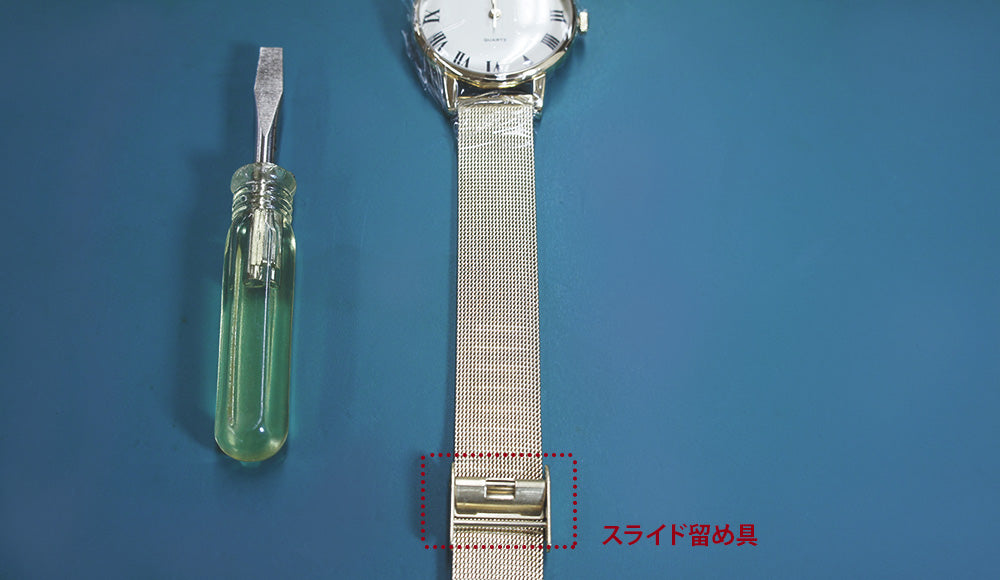
What to prepare
Minus driver ※ There is no problem with general purpose products.
Vinyl cut end ※ For cushioning materials and flaw prevention.
Workflow
- Remove the fixed slide fastener.
- Slide fastener is set at the desired size position.
- Secure the slide fastener.

Name
The way of calling each site is as shown in the image.
※ Please note that the pins are bending and damaged if the pins are fulcrum.

Select the size of the minus driver
Use a minus screwdriver that matches the image street hole.
If the minus driver is too thin, the ground plane with the board becomes smaller, and the force is concentrated at one point, and the slide clamp may be deformed.

Add vinyl cut
Perform to prevent it and prevent scratches.

Fixing a minus screwdriver in the hole
- Make sure that the minus driver is securely fixed to the sculpting point and the action point.
- On the other hand, please suppress the outer part and belt of the slide fastener firmly
※ Please place the entire belt on the work table.
If you remove it in the air, you may want to change the belt to a one point of the belt.

Lift the board
- Lower the minus screwdriver.
- The board lifts.

Create a board against the opposite side
Slide fasteners are out of belt and are free.

Slide and adjust the size position
Slide to the desired size position.

Backside concave / slide fastener convex
Scale part concave on the back side of the belt
Significant partial convex of slide fasteners

Align the unevenness on the back of the belt
Please suppress it so as not to deviate with your finger.

Temporarily fix the board
Return the plate on the front side from the unevenness.
Temporarily fix it lightly with your finger.

Lower the board with
- Add vinyl.
- Put a negative screwdriver in the hole and secure the scope side and point of action.
- Slide fastener parts and belts with the opposite hand.

Lower the board with
- Lower the board with a minus screwdriver.
- The board falls.

status check
Make sure that the board is firmly down.

